
In this guide, we’ll walk you through the process of downloading and running Nethunter without the need for root access on your Android device. Let’s get started!
so lesss gooo
Installing Termux
To begin, we’ll use Termux as our command-line environment for the following steps. You can download the latest version of Termux from the official repository on GitHub. Be sure to select the version ending with “_arm64-v8a.”
.png)
Installing Nethunter
Once Termux is installed, open it and enter the following commands:
$ termux-setup-storage to grant access to the storage of your device
$ pkg install wget to install wget
$ wget -O install-nethunter-termux <https://offs.ec/2MceZWr to install the nethunter installer
$ chmod +x install-nethunter-termux granting the execute permission to the file
$ ./install-nethunter-termux run the nethunter installer
When running the Nethunter installer, you’ll be presented with the following menu:
[*] Checking device architecture …
[1] NetHunter ARM64 (full)
[2] NetHunter ARM64 (minimal)
[3] NetHunter ARM64 (nano)
Enter the image you want to install:
So first let me explain what is the difference between the 3
NetHunter Full: Comprehensive version with extensive penetration testing tools.
NetHunter Minimal: Intermediate choice with broader toolset for varied testing.
NetHunter Nano: Minimalistic, lightweight version for basic wireless testing.
For stability reasons, select option 2 (NetHunter ARM64 minimal). It will download some files and extracting it , you’ll be asked if you want to delete the rootfs files; choose “N” to retain them.
[?] Delete Downloaded rootfs file ? [y/N]
[?] Delete Downloaded rootfs file ? [y/N]    //type N then enter
Now NetHunter successfully installed
now try to run this command
nethunter kex passwd
if there is no error then set your password it will ask you if you want a view-only password choose n now skip the next step
Fixing Vncpasswd Command Not Found
now let’s get ready to fix some errors

now type nethunteror nh in termux then type
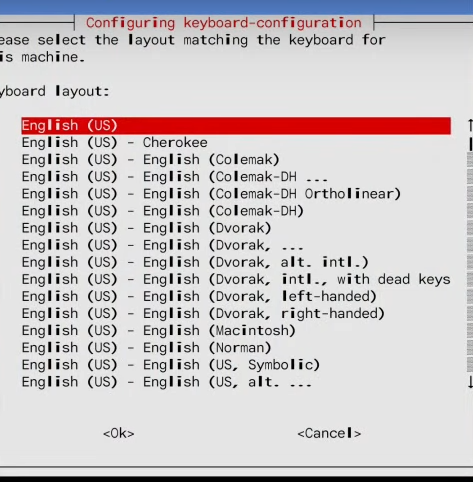
sudo nano /etc/resolv.conf it will ask you for a password the password is “kali”
so now you open a file
 now use the up and down arrows to move in the file and go to this line
nameserver 127.0.0.53 and change it to nameserver 8.8.8.8
then press on CTRL button then X in your keyboard then type Y then Enter
now you have saved the file with your edit….remember how to save a file
now type sudo apt update then clear to clear the screen
now type sudo apt install kali-desktop-xfce dbus-x11 tigervnc-standalone-server -y
it will download some files so wait some minutes
while downloading this message will come to you
just press enter from your keyboard
after the process complete clear the screen then type
nano .vnc/xstartup
the file is empty you will add the following lines:
dbus-launch
startxfce4
then save the file
and type chmod +x .vnc/xstartup press enter after that type kex and enter
it will ask you to enter a password type any password but something easy to remember then verify it and it will ask you if you want a view-only password choosen
it will give an output like this

Note down the RFB PORT displayed; we’ll need it shortly.
don’t close termux leave it running
now we have fixed all error let’s move to the next step
Run NetHunter Kex
now you need to install NetHunter store from this link after downloading the store app open it and type in the search “kex” and download this app just press the install button and after installing it will ask you to allow installing unkown apps from the Nethunter store allow it and setup the nethunter kex

Now open the app and allow it to access files on the device then enter the RFB Port and you password then press connect

now press the connect button if an error show up don’t worry go back to termux and close it then go to termux icon on your device then press a long press on it and choose open new session.
then type nethunter kex & and it will show the same information that have the RFP Port if the port changes ensure that the RFB Port matches in NetHunter Kex. If errors persist, proceed to the next step.
and if there is no error the kali will open with you but after 3–5 min it will give you and error and the session will be closed so go to the next step.
Fixing Process completed (signal 9)
To resolve previous errors, enable Developer Mode on your device (instructions vary by device model). For Samsung devices, follow these steps:
1. Go to "Settings"
2. Tap "About device" or "About phone"
3. Tap “Software information”
4. Tap “Build number” seven times. ...
6. The "Developer options" menu will now appear in your Settings menu.
after turning on the developer mode go to the options and turn on USB debugging (MI & Poco There will be two options that says USB Debugging enable all of them )
Then open your laptop or pc and go to your browser and search for SDK Platform-Tools
or go to this link and download it for your laptop or pc

Connect your device with your laptop or pc using a cable then type in PowerShell
./adb devices to check if the device is connected
Try to run this command before and after you plug your device to check if your device is connected
now after your device is connected type this
./adb shell "/system/bin/device_config put activity_manager max_phantom_processes 2147483647”
note : if you reboot your device you need to repeat this steps again
Now we have solved all the problems and everything should works okay
Done
With these steps, you should have successfully installed and configured Nethunter without root access. Keep in mind that the minimal version may not include all tools, so you can install additional tools manually from GitHub or use a tool like katoolin.
That’s it! Enjoy using Nethunter on your device.
I really appreciate you taking the time to read my article. If you found it helpful, I kindly ask you to show your appreciation by tapping the 👏 button. Your feedback is important to me, so please feel free to share your thoughts with me.